TABLE OF CONTENTS
Using Freshworks Analytics, you can download reports and widgets, send them by email, or
schedule them to be emailed on a recurring basis.
Note: Exporting a report or widget is different from using the Data Export option available
under Analytics Settings. For more information, see Export data.
Export reports
The report export options allow you to send a report by email through ‘Send email’, schedule
automatic emails through ‘Schedule email’, or directly download the report through ‘Download
File’ options respectively.
To begin:
1. Log in to your Freshservice account.
2. Go to AI Insights and Analytics from the left navigation menu.
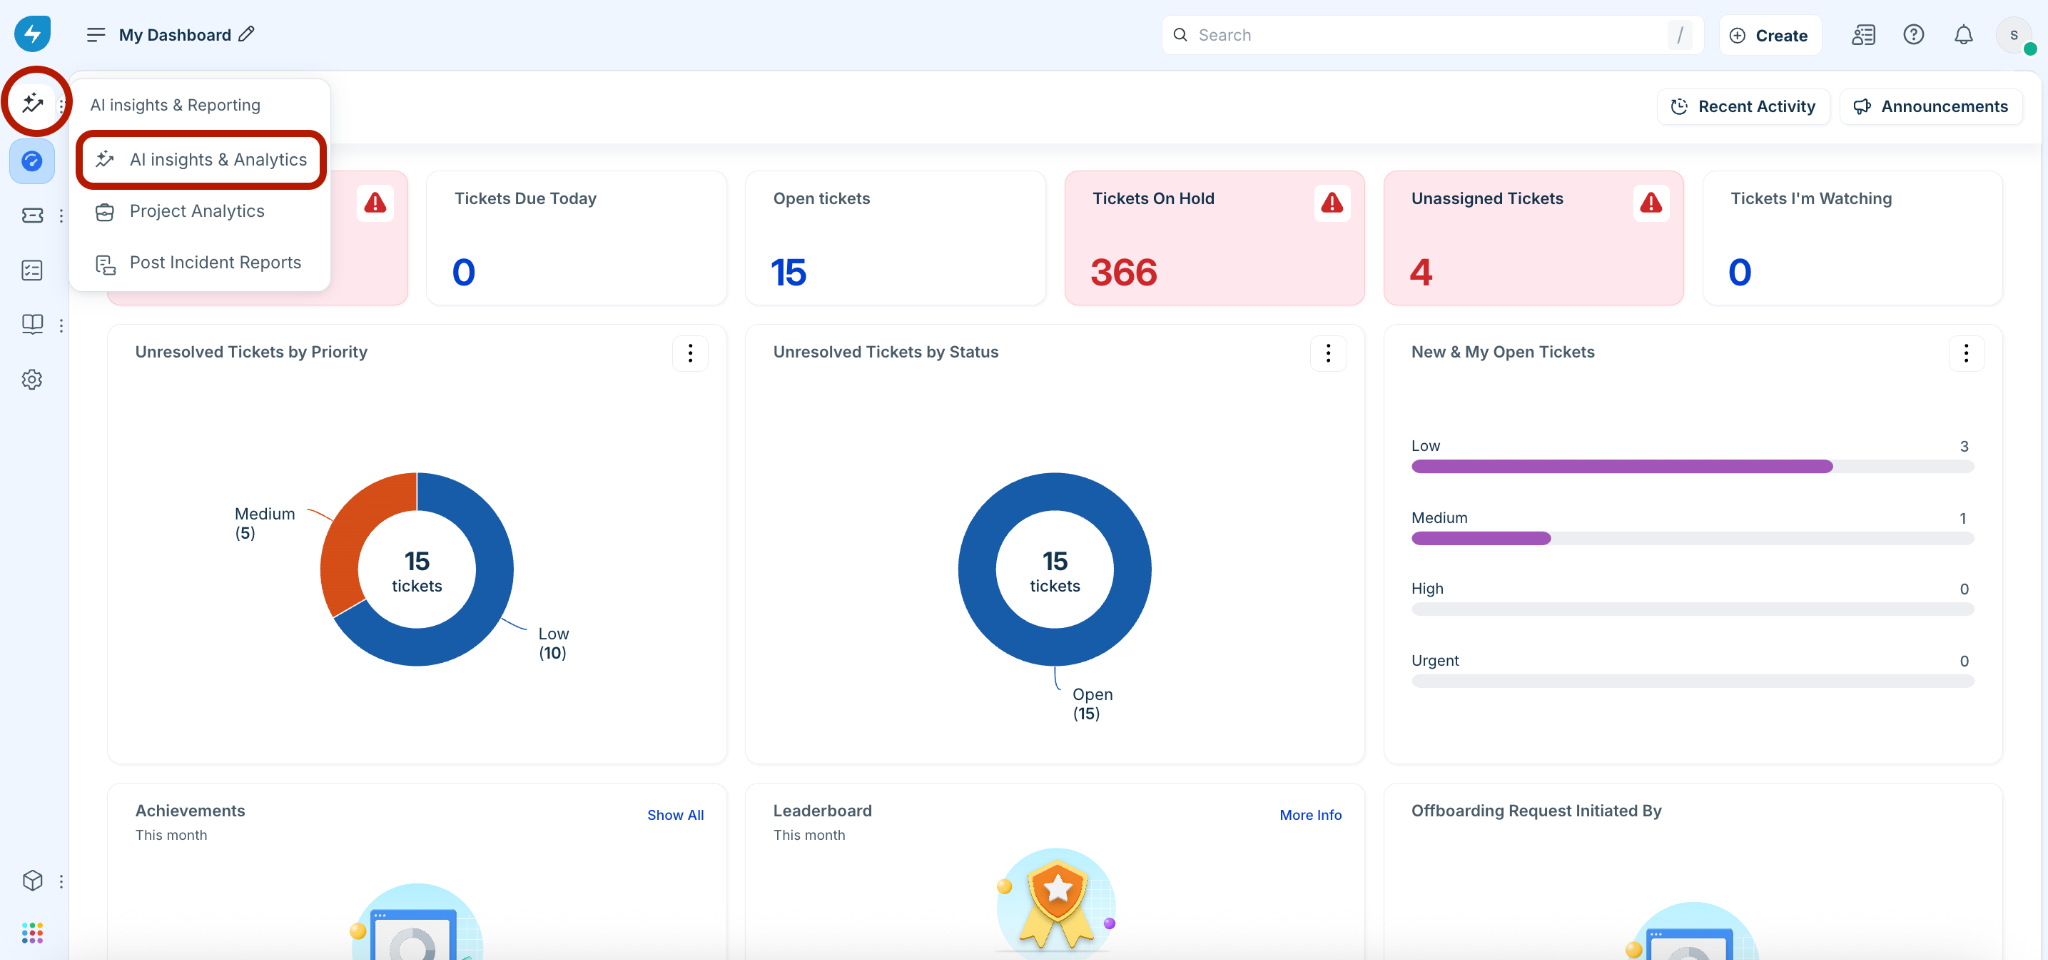
3. Select Analytics.

4. Open the report you want to export or download.
5. Click Export report.
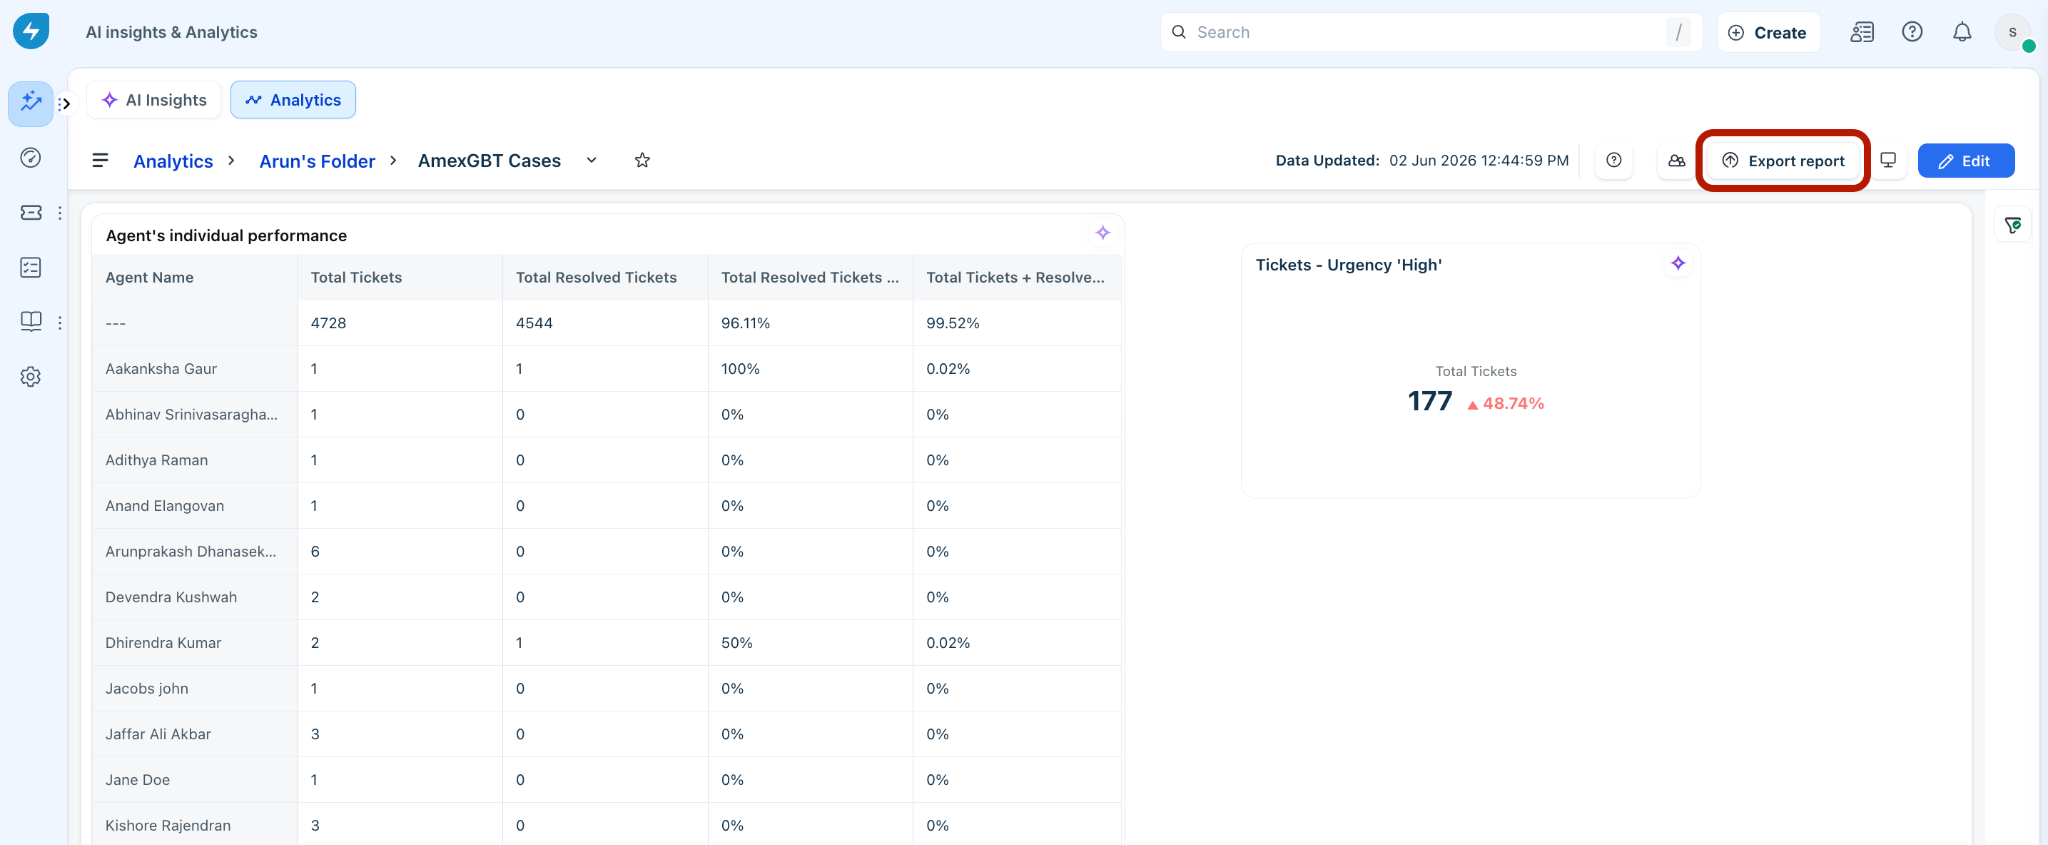
The Export report dialog will appear displaying various options.
The following sections describe the available report export actions.
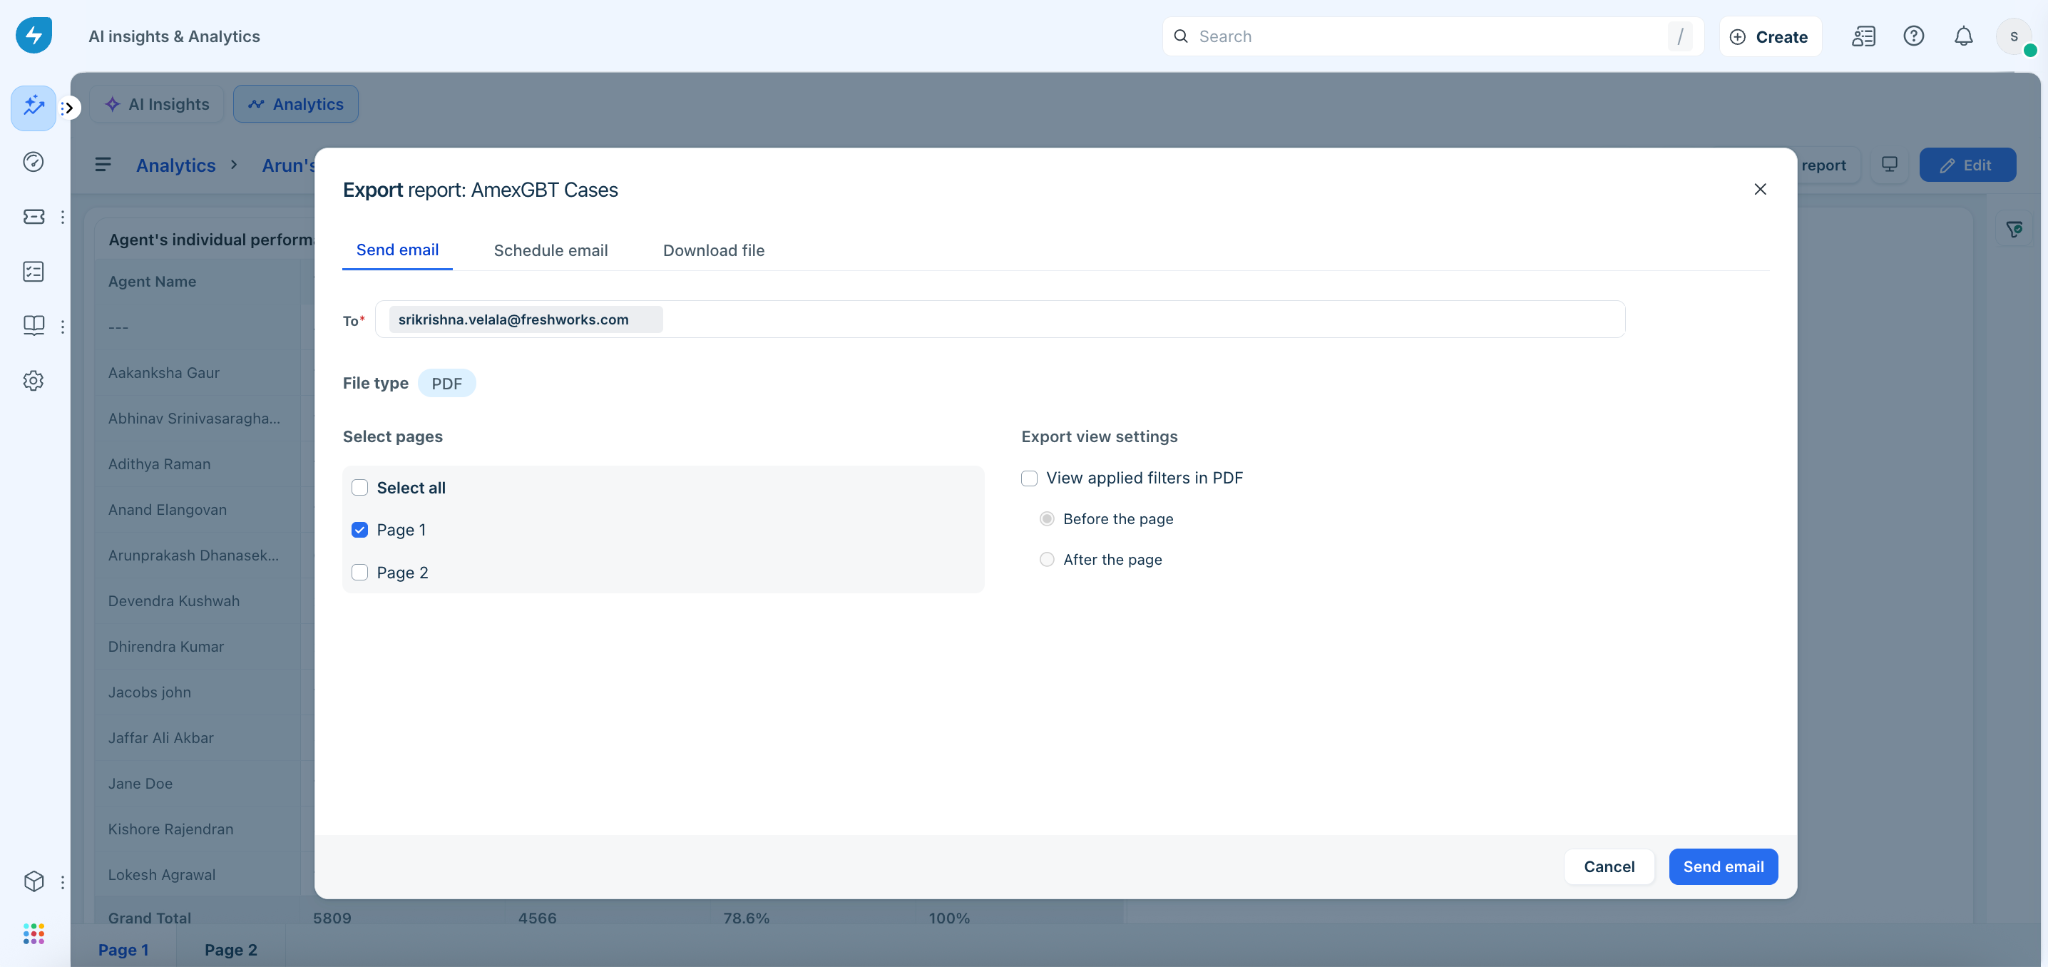
Send email
To send the report by email:
1. Select the Send email tab.
2. Select ‘With unsaved changes’ or ‘Without unsaved changes’, depending on whether you
want the export to reflect any unsaved changes such as filters or updated chart types.
Note: These options appear only when unsaved changes exist.
3. Enter the recipient’s email address.
Note: The file type PDF is selected by default for Send email, Schedule email, and Download file options, and it is the only supported format.
4. Under Select pages, choose the pages you want to include.
5. Under Export view settings, select View applied filters in PDF if you want filters to be included in the exported file, and choose whether they should appear before or after the page.
6. Click Send email.
Download file
To download the report:
1. Select the Download file tab.
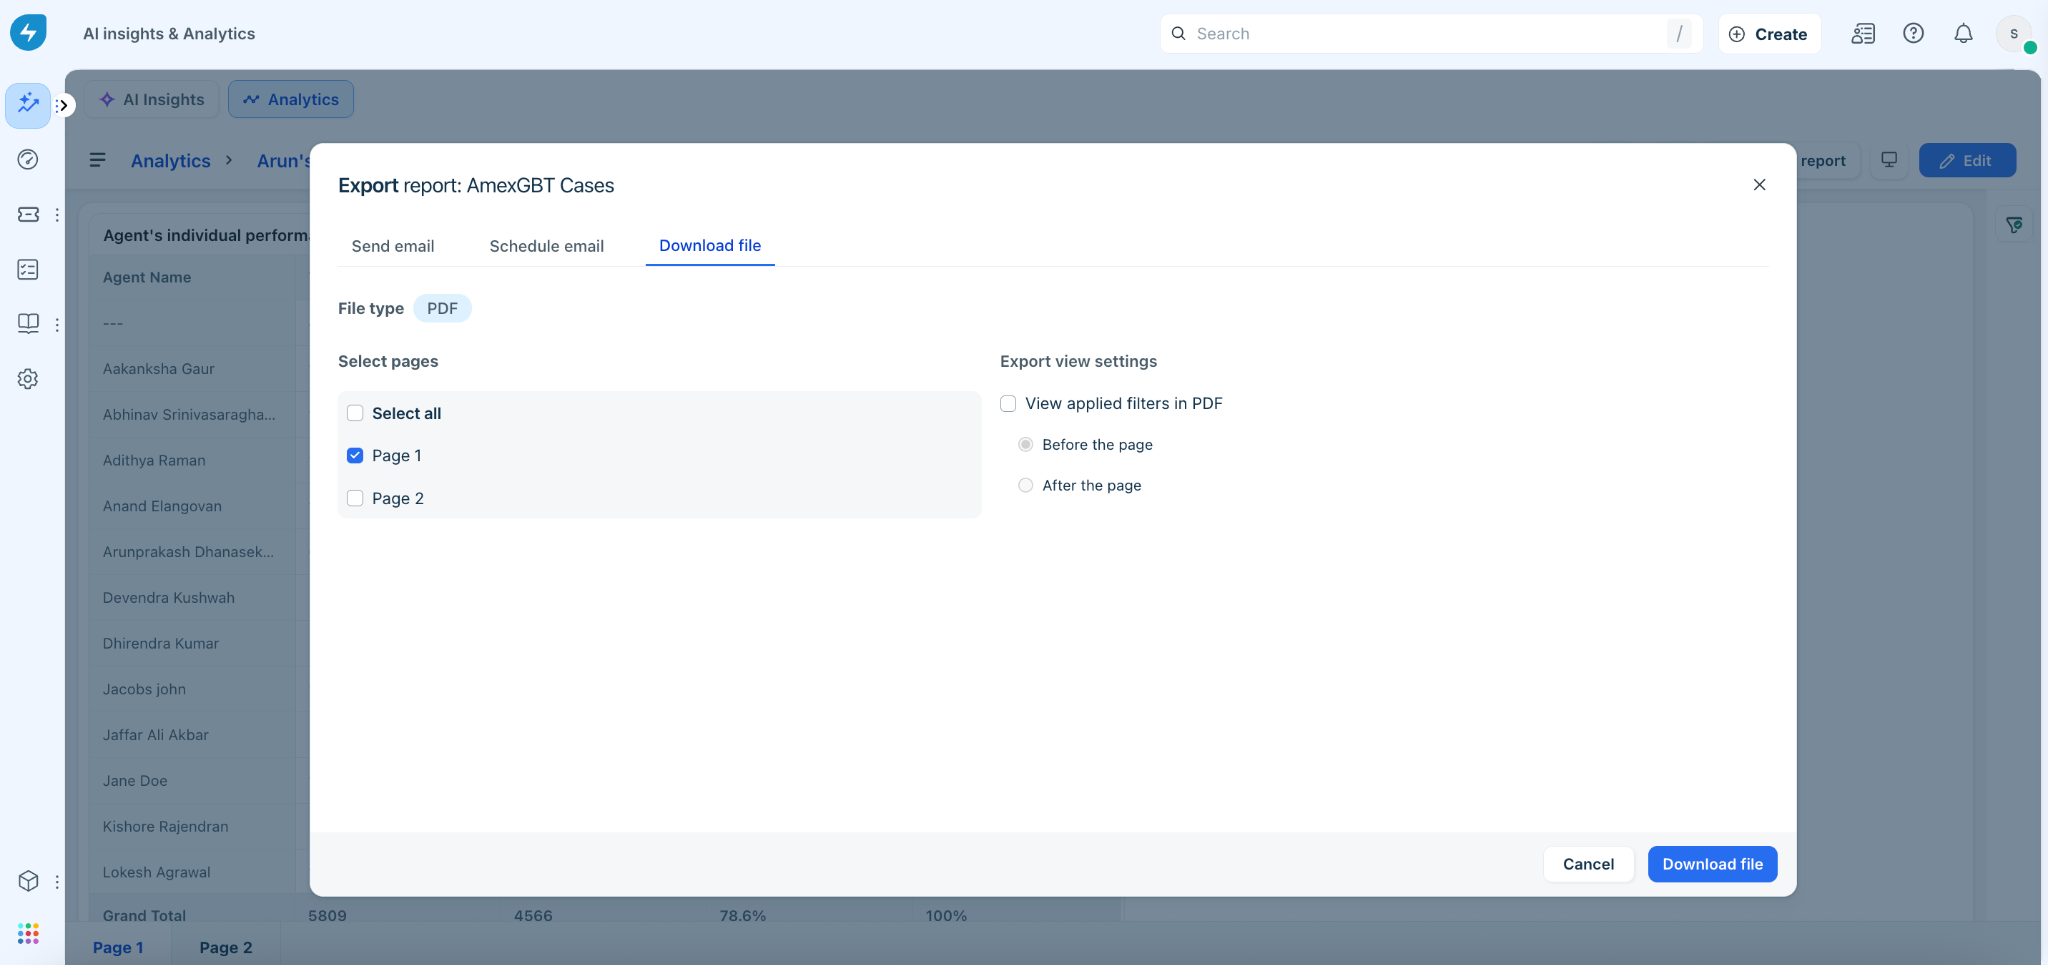
2. Select ‘With unsaved changes’ or ‘Without unsaved changes’ when prompted.
3. Select the pages to export under Select pages.
4. Select the required Export view settings.
5. Click Download file.
Schedule email
To create or edit a schedule for a report export:
1. Select the Schedule email tab.

2. Click Create new or select an existing schedule.
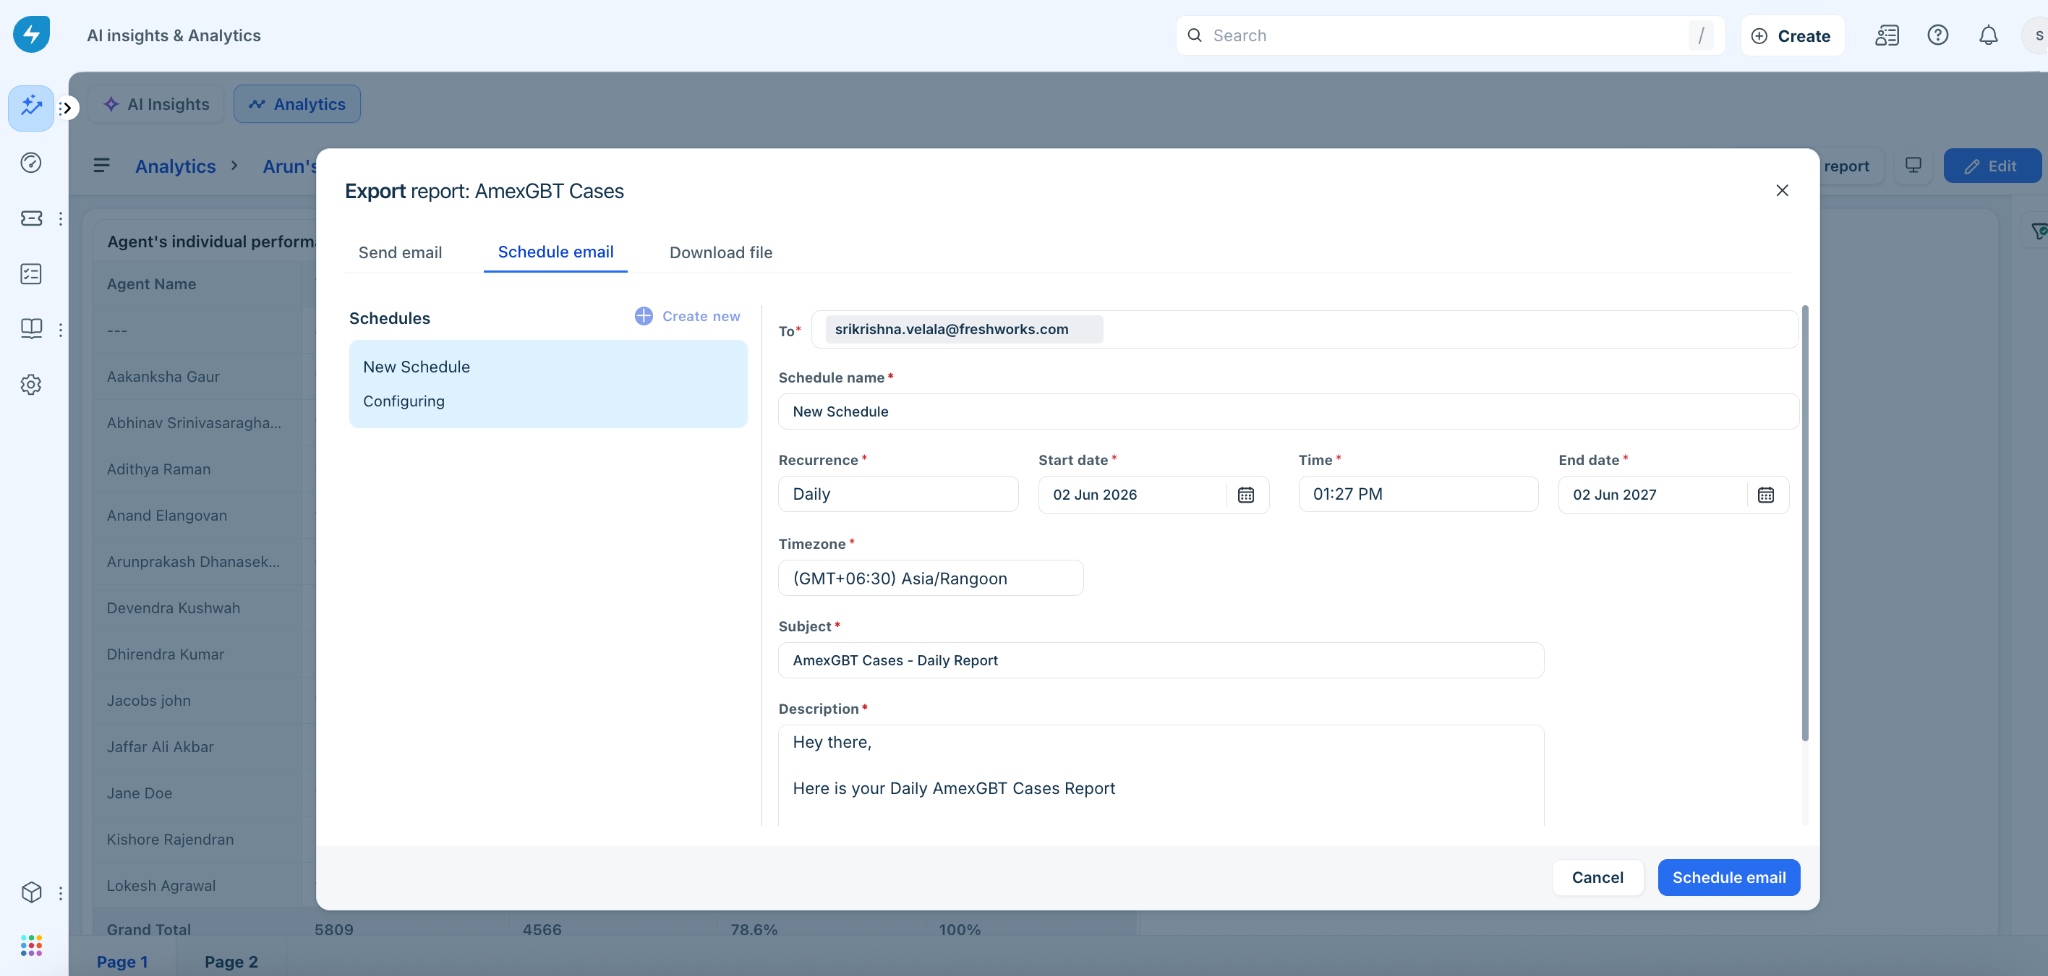
3. Enter or modify the recipients, add/edit a schedule name, and set/modify additional options (such as recurrence, time, and start and end dates).
Note: The end date defaults to one year from the start date, but it can be modified.
4. Select the required timezone.
5. Enter or modify the email subject and description.
6. Click Schedule email.
Note: You can also manage all the schedules from Analytics > Settings > Schedules.

Export widgets
Widgets can also be sent by email, scheduled for recurring email delivery, or downloaded directly.
1. Open any report.
2. Hover over a widget and click the ellipses/options icon. Then, select Export widget.
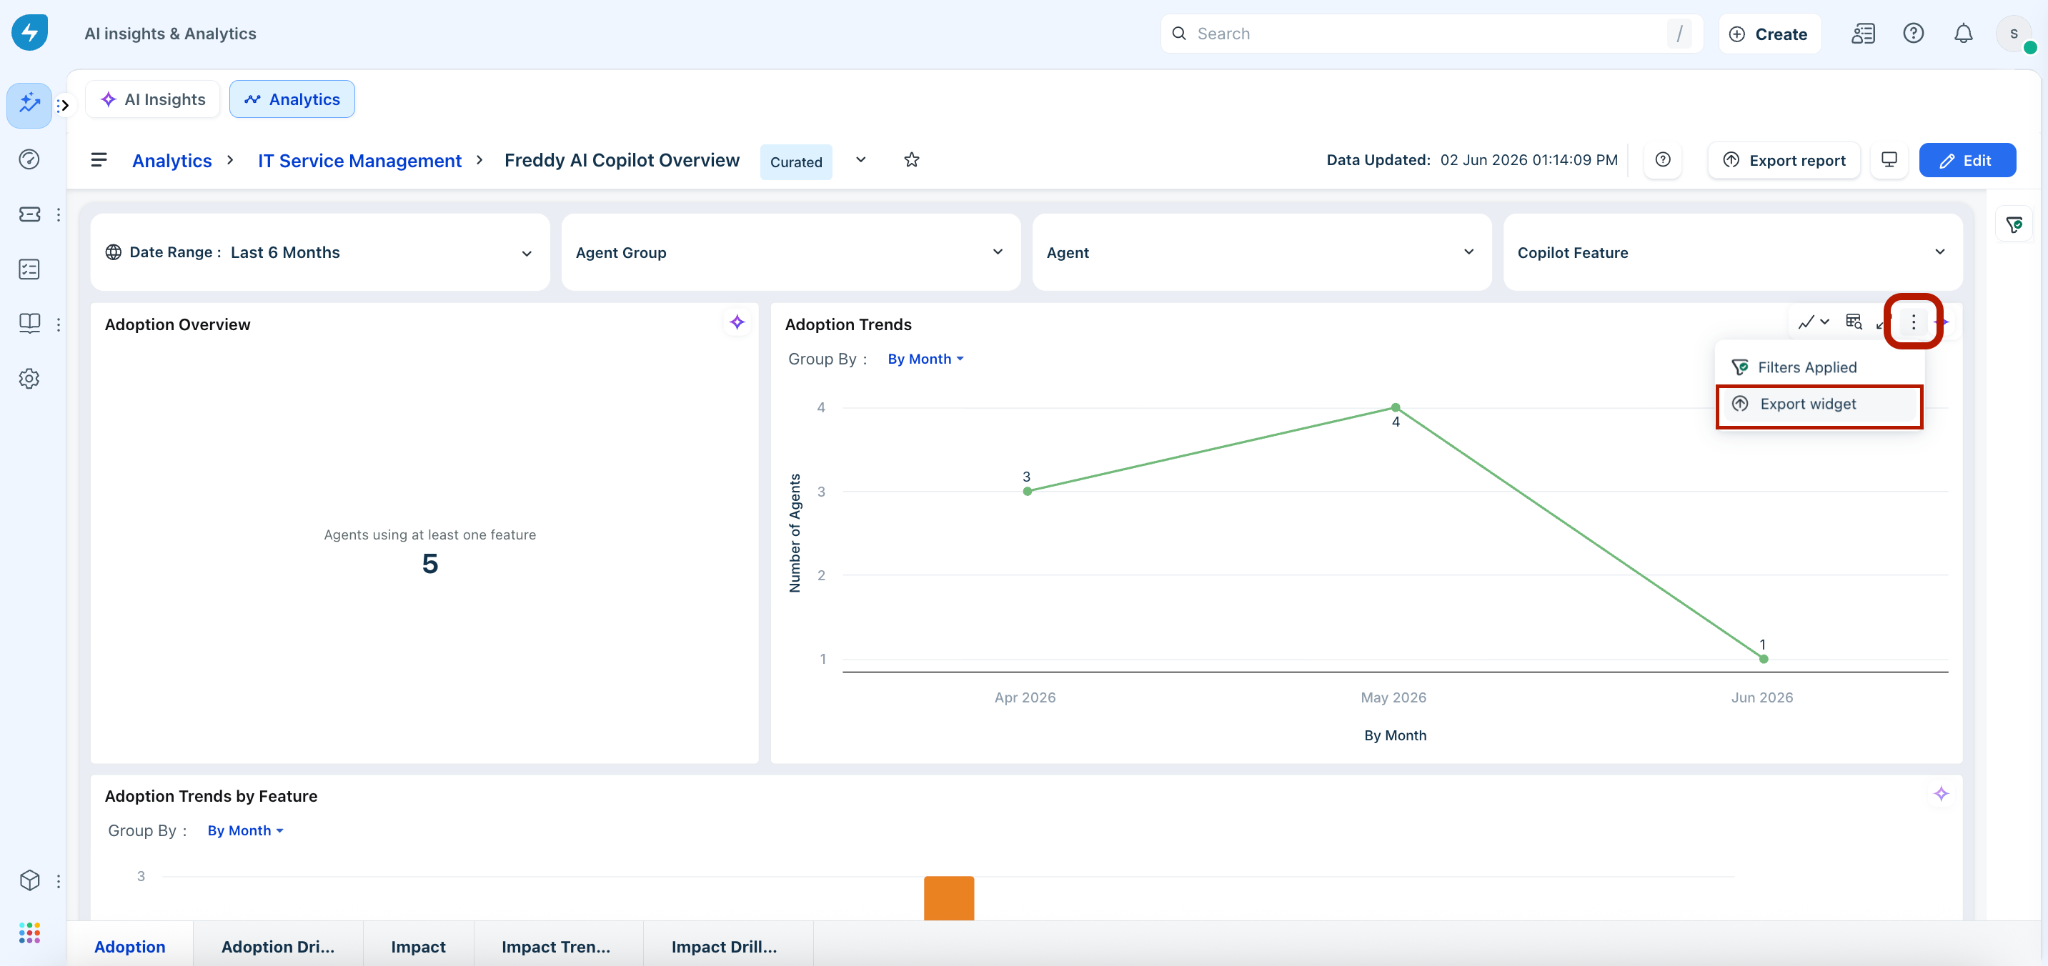
The Export widget dialog will appear displaying various options.
The following sections describe the available widget export actions.
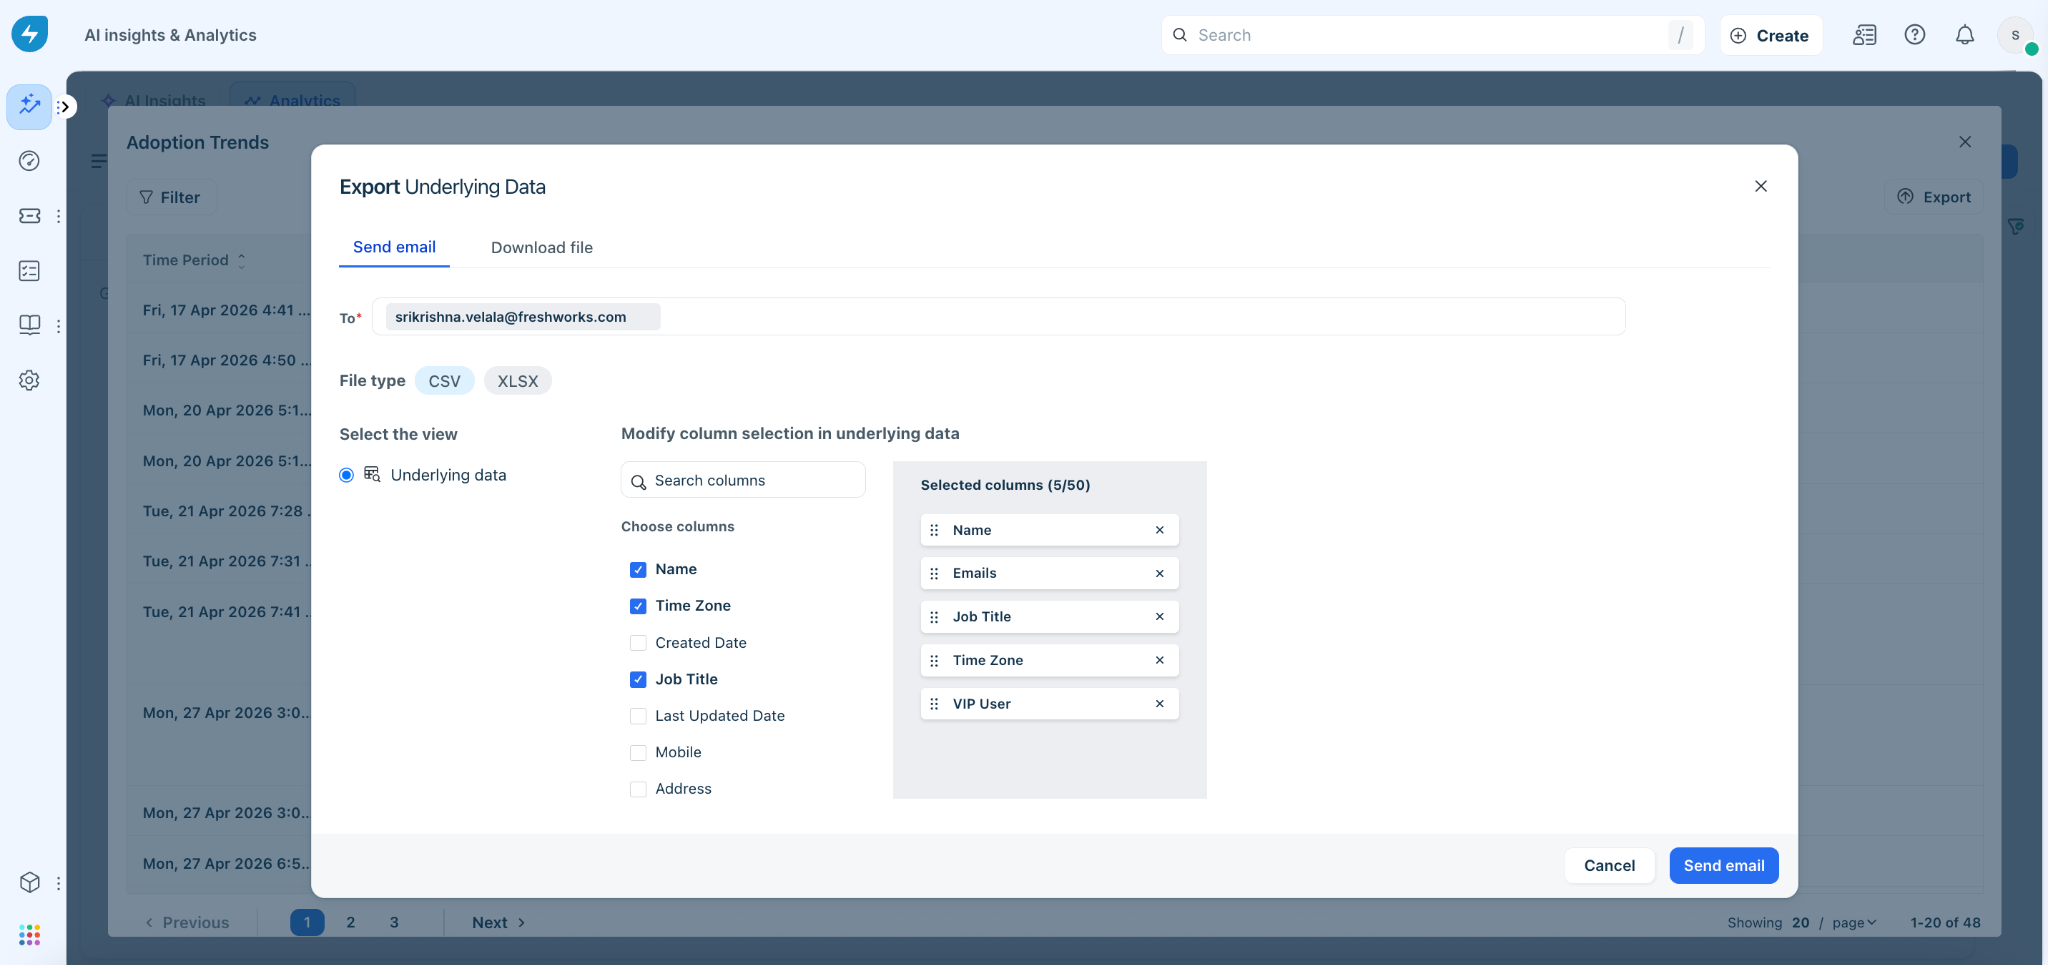
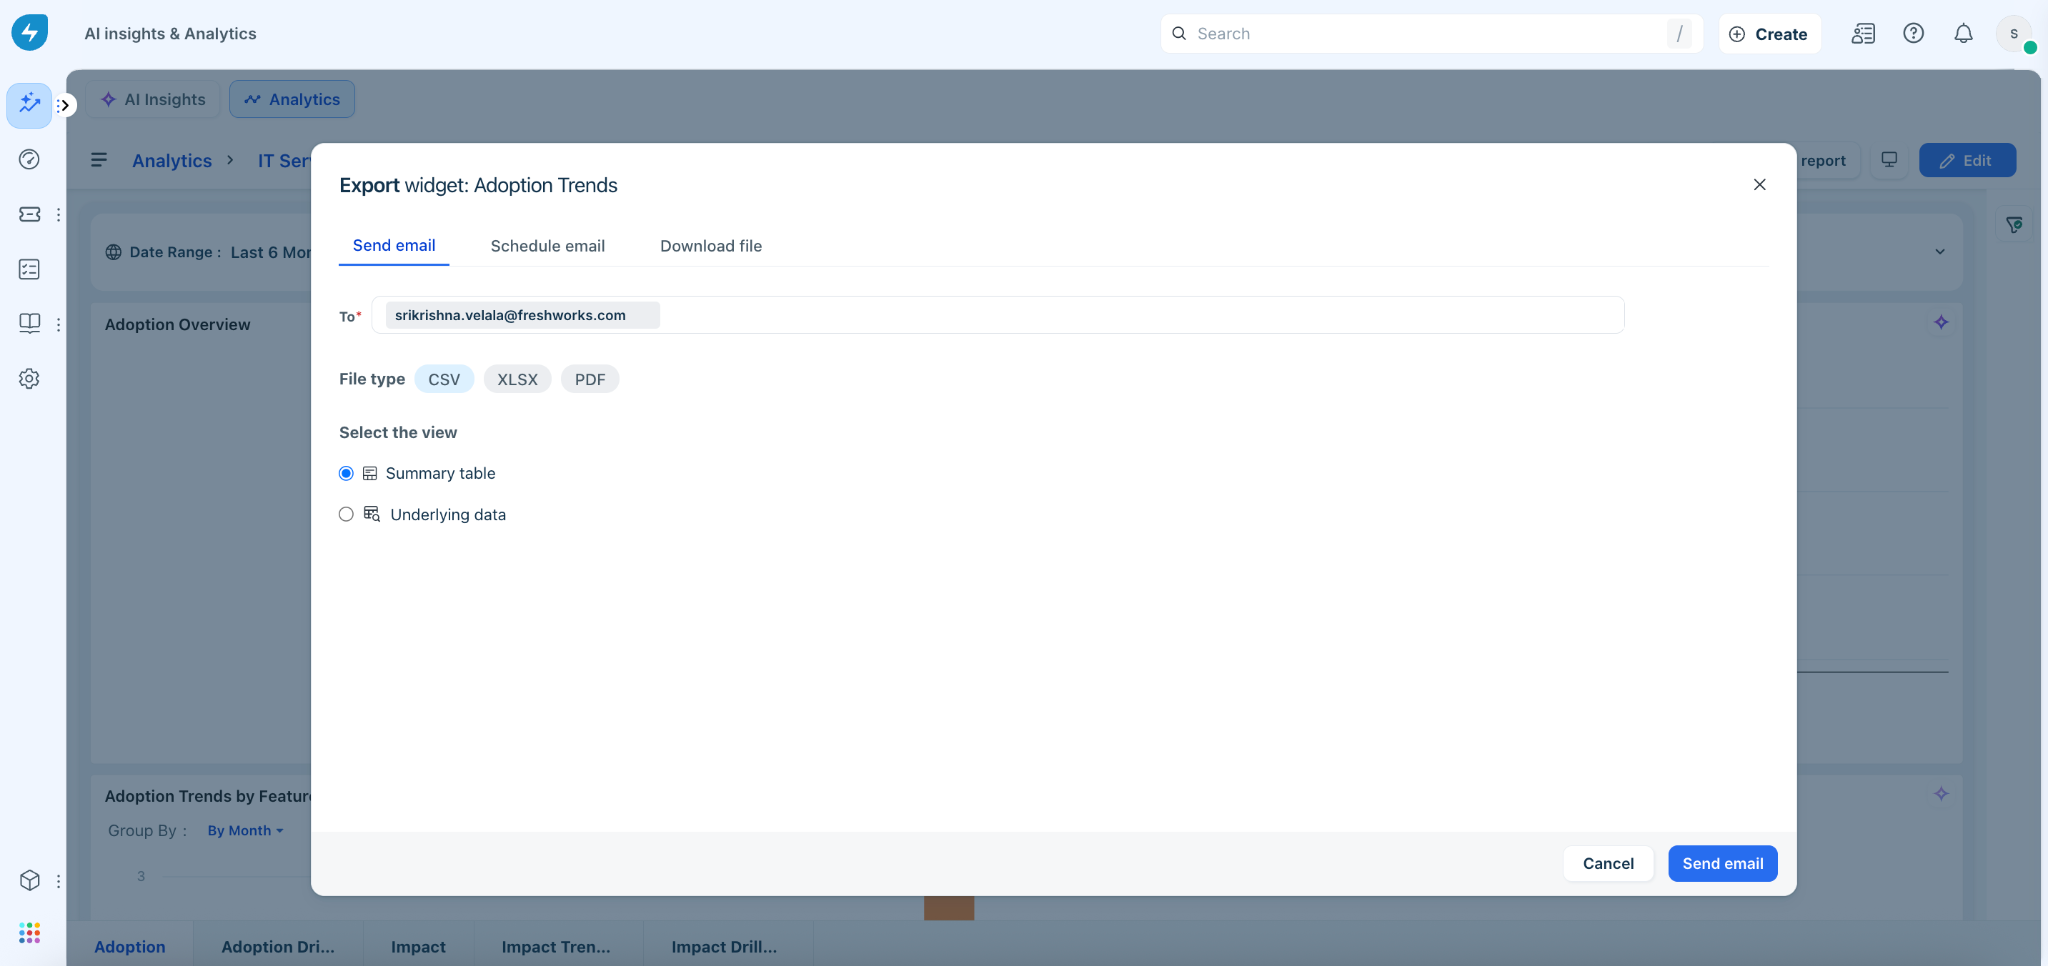
Send email
To email a widget:
1. Select the Send email tab.
2. Select ‘With unsaved changes’ or ‘Without unsaved changes’ (if applicable).
Note: These options are available only if you have unsaved changes in the report, such as applied filters or updated chart types.
3. Enter the recipient email address.
4. Select the required file type: CSV, XLSX, or PDF.
5. Under Select the view, choose how the widget should be exported.
Note: The view selection options vary depending on the file type that is selected.
6. Click Send email.
Download file
To download a widget:
1. Select the Download file tab.
2. Select ‘With unsaved changes’ or ‘Without unsaved changes’ (if applicable).
3. Select the required file type.
4. Under Select the view, choose how the widget should be downloaded.
5. Click Download file.
Schedule email
To create or edit a schedule for a widget export:
1. Select the Schedule email tab.
2. Click Create new or select an existing schedule.
3. Enter or modify the recipients, add/edit a schedule name, and set/modify additional options (such as recurrence, time, and start and end dates).
Note: The end date defaults to one year from the start date, but it can be modified.
4. Select the required timezone.
5. Enter or modify the email subject and description.
6. Select the required file type and the appropriate view.
7. Click Schedule email.
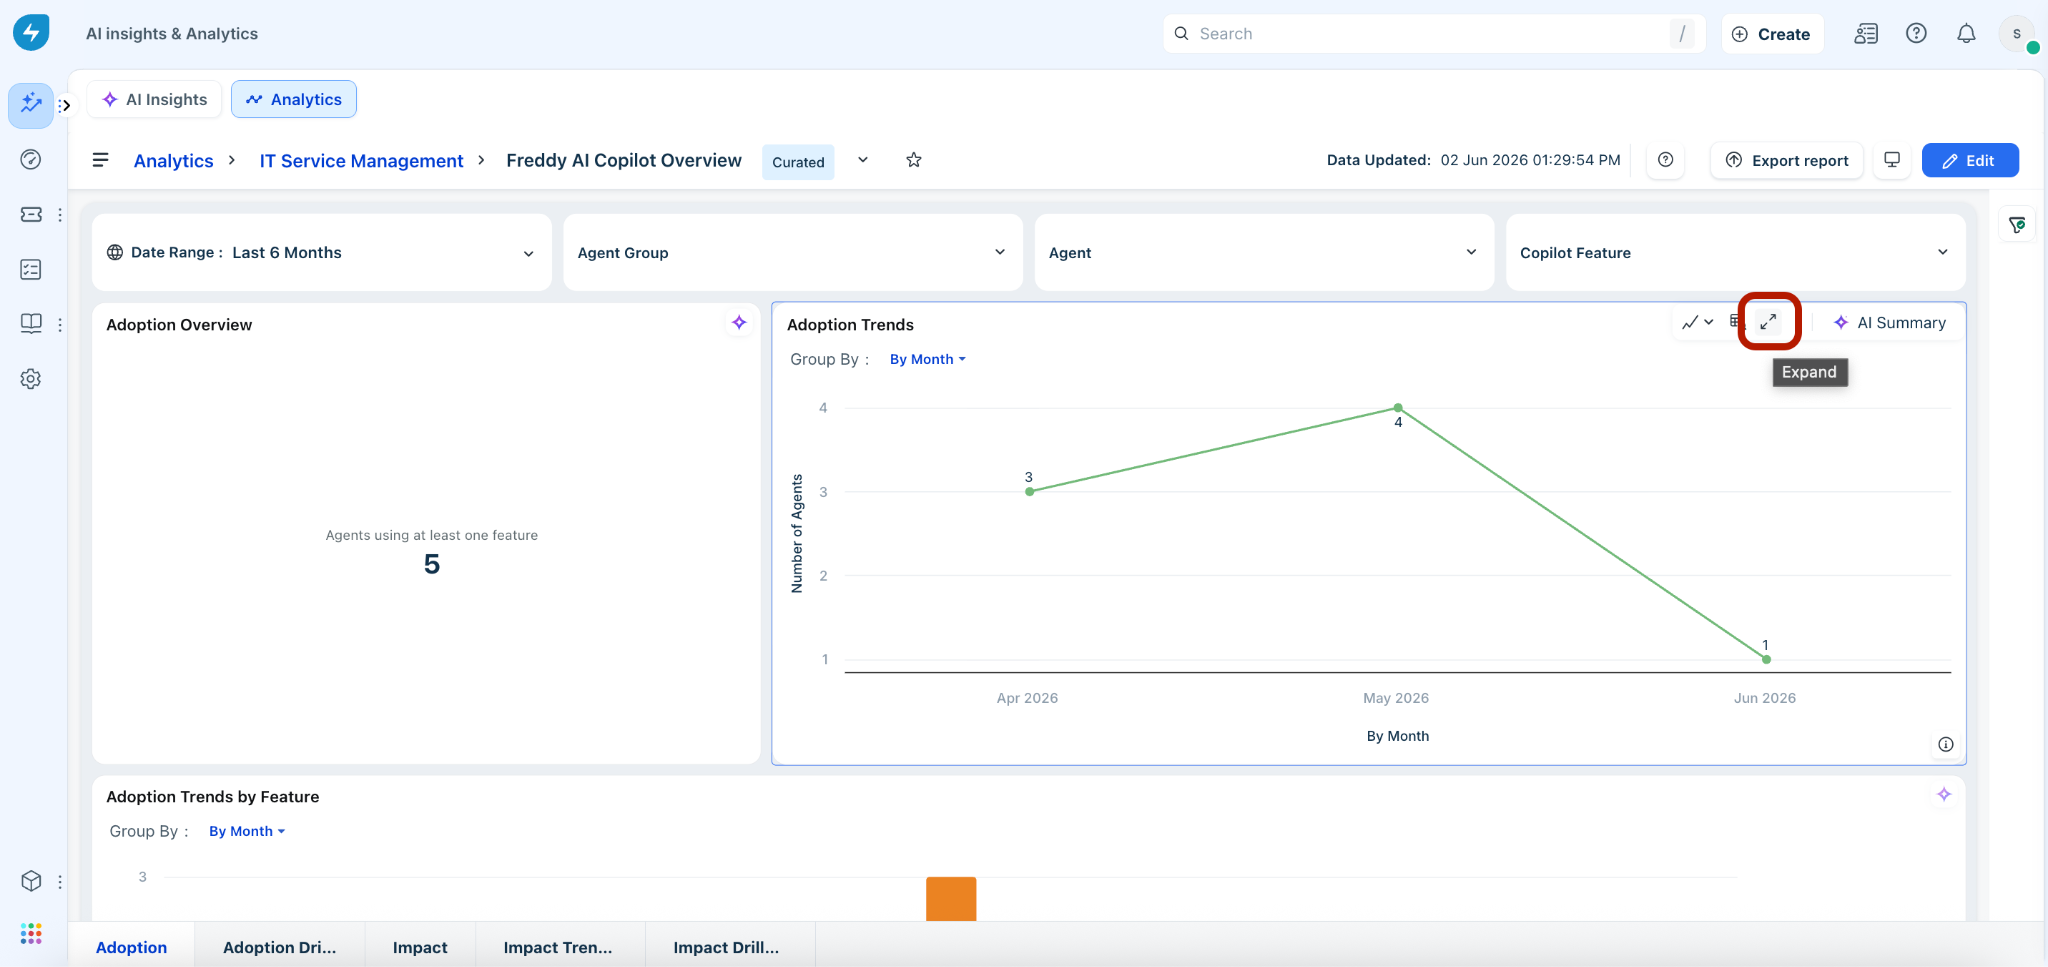
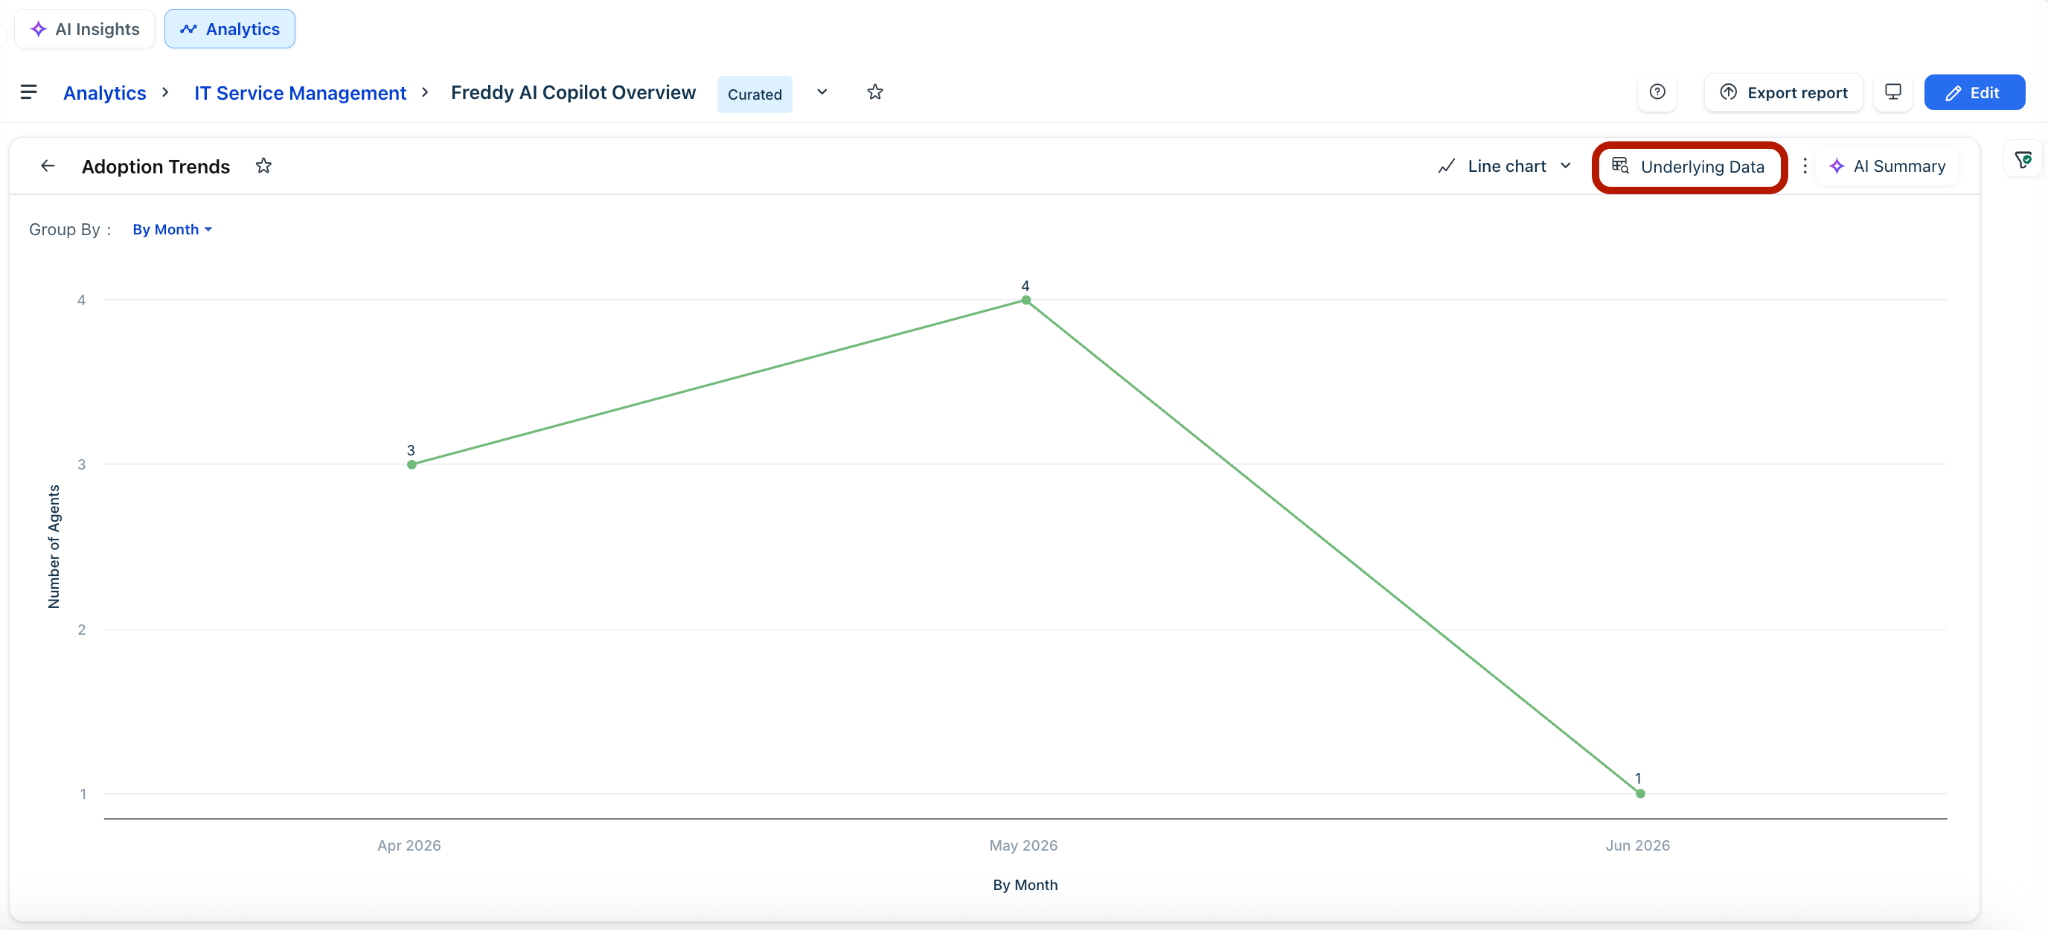
Export underlying data in a widget
Underlying data represents the complete dataset used to generate a widget. This data can also be emailed or downloaded.
To export underlying data:
1. Hover over a widget and click the ‘Expand’ icon.
2. Click Underlying Data.
3. Click Export.
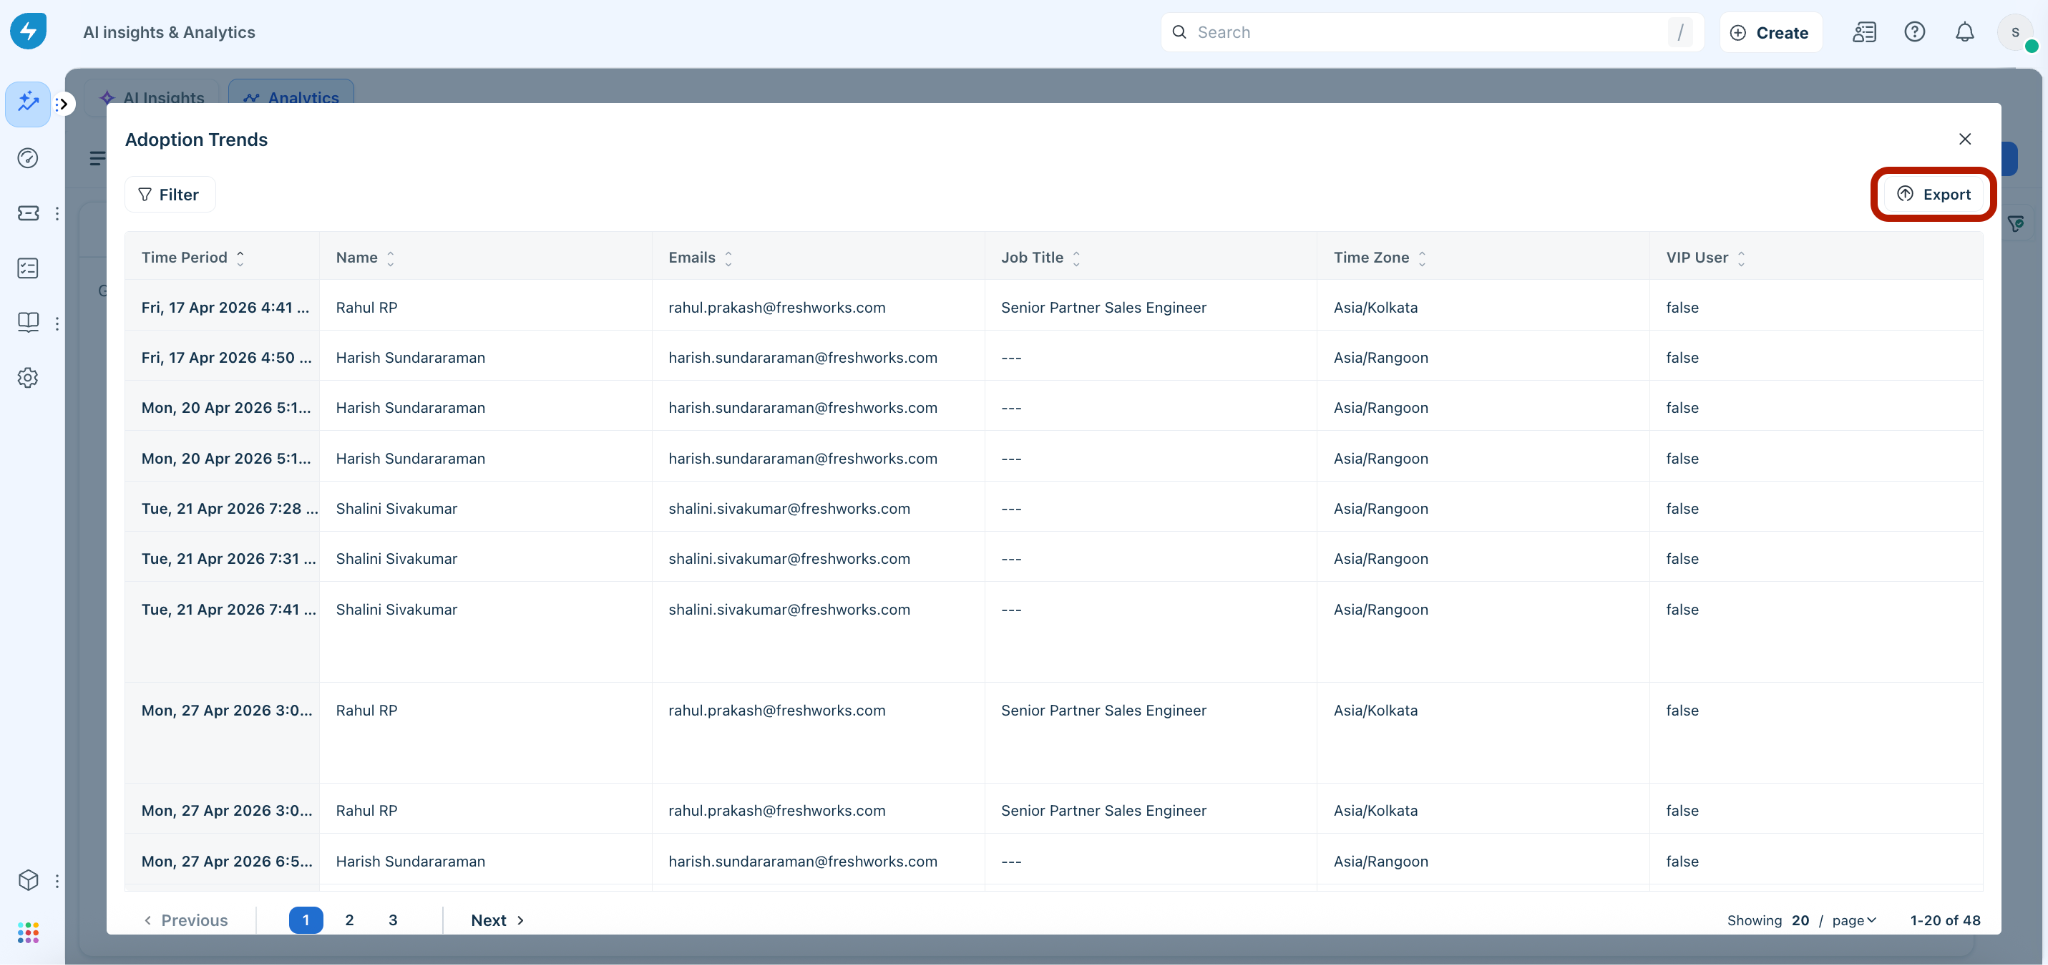
The Export Underlying Data dialog will appear displaying various options.